Reverse image search using perceptual hashes
Using perceptual hashes for image search.
I was curious about how Google Image Search worked, but I didn’t want to delve right into their implementation. Instead, I wanted to explore how to build my own reverse image search engine from scratch.
I had a rough sketch ready: user puts in their image, the engine searches for an image from a “database” and returns relevant items back to the user. But, what is the engine, really?
For checking if an item is similar to another, you need to have something to compare against it. Images have pixels, but is it the best choice? Nope. It’s really obvious that it would only work well on completely identical images, and not similar images. The emphasis is on similarity.
One option is to represent an image as something more tangible, such as a hash. However, using cryptographic hashes like MD5 or SHA256 is not suitable for this context, as they are designed to generate unpredictable results. Small changes to an image could cause drastic changes in the hash, making it unsuitable for comparing similar images.
That’s when I discovered perceptual hashes, which felt like a promising starting point.
But what even are perceptual hashes?
Perceptual hashes 
Perceptual hashes are a type of digital fingerprinting algorithm that produces a hash, or a fingerprint that uniquely identifies the input media, just like human fingerprints. Unlike traditional cryptographic hashes, which are designed to produce a unique and unpredictable output for any given input, perceptual hashes are specifically tailored to capture the unique visual characteristics of an image in a way that is robust to minor variations.
Perceptual hashing algorithms work by analyzing the structural and spatial characteristics of an image, such as its edges, lines, textures, and colors, and then transforming this information into a compact and standardized digital signature that can be used to identify similar images. The resulting perceptual hash is a fixed-length binary code that is highly sensitive to changes in the visual content of an image, but relatively insensitive to changes in image format, resolution, compression, or noise.
Perceptual hashes have a wide range of applications, including content-based image retrieval, image deduplication, copyright infringement detection, and reverse image search. By using perceptual hashes, it’s possible to efficiently compare large volumes of images and identify similar or identical images, even if they have been modified, resized, cropped, or otherwise altered.
Starting with ahash 
One of the most common perceptual hashing algorithms used for reverse image search is the average hash, or ahash for short. Here’s how it works:
- Resize the input image to a fixed resolution, such as 8x8 pixels.
- Convert the resized image to grayscale.
- Compute the average brightness of the grayscale image.
- Generate a hash by comparing each pixel’s brightness to the average value.
- If the pixel is brighter than the average, mark it as a 1; if it is darker, mark it as a 0.
- The resulting hash is a 64-bit binary code that can be used to compare the input image to other images in a database.


By converting the input image to grayscale and resizing it to a fixed resolution, the ahash algorithm standardizes the visual content of the image and reduces the impact of irrelevant features like color or texture. By computing the average brightness of the resized image and comparing each pixel to this value, the ahash algorithm generates a binary code that is highly sensitive to changes in the visual content of the image, but relatively insensitive to changes in format, resolution, compression, or noise.
Here’s the Go code for ahash:
package hash

import (
	"image"
)

type AvgHash struct{}

func NewAverageHash() *AvgHash {
	return &AvgHash{}
}

// GenerateHash generates the hash value using average hash.
func (ah *AvgHash) GenerateHash(img image.Image) uint64 {
	// Resize source image to 8x8.
	resizedImg := Resize(8, 8, img)

	// Convert the resized image to grayscale.
	grayImg := Grayscale(resizedImg)

	// Find the mean using the grayscale image.
	mean := FindMean(grayImg)

	// Return average hash.
	return ah.getHash(grayImg, mean)
}

// getHash generates the average hash from the grayscale image and the mean.
func (*AvgHash) getHash(img image.Image, mean uint32) uint64 {
	var hash, pos uint64
	pos = 1
	bounds := img.Bounds()

	for x := bounds.Min.X; x < bounds.Max.X; x++ {
		for y := bounds.Min.Y; y < bounds.Max.Y; y++ {
			r, _, _, _ := img.At(x, y).RGBA()
			if r > mean {
				hash |= 1 << pos // set bit to 1
			}
			pos++
		}
	}

	return hash
}
Reverse image search 
Reverse image search involves finding images that are similar to a given query image.
On composing on the earlier findings, the core “engine” would look like this:
- user sends an image for search
- generate ahash for the image
- store ahash in the database
- compare the input image’s ahash to the hashes in the database
Everything is straightforward, except the comparison technique. How do you compare images based on the ahash?
Hmm, a hash is represented as a string/sequence - which string/sequence comparison technique is easier? Some sort of a technique which would give us a distance representing the difference between two entities would be a nice start.
Hmm, distance. What would be a nice algorithm for calculating distances?
Hamming distance comes to my mind - it calculates the number of bits different between the two values. Looks perfect for this usecase.
Here’s an example, the hamming distance for these hashes will be 1 (only 1 bit is different):
01110100100100101100110010001110101000101000100001001101101010100111010010010010110011001000011010100010100010000100110110101010
Since the comparison technique is finalized, here’s the overall flow:
- user sends an image for search
- generate ahash for the image
- store ahash in the database
- compare the input image’s ahash to the hashes in the database using hamming distance
Looks good! Here’s the Go code for the engine’s core:
(The project is at github.com/burntcarrot/hashsearch.)
package image

import (
	"github.com/burntcarrot/hashsearch/entity"
	"github.com/burntcarrot/hashsearch/pkg/hash"
)

type Service struct {
	repo Repository
}

// NewService returns the image service.
func NewService(r Repository) *Service {
	return &Service{
		repo: r,
	}
}

func (s *Service) Create(path string) error {
	// Create image entity.
	e, err := entity.NewImage(path)
	if err != nil {
		return err
	}

	// Load as image.
	img, err := hash.LoadAsImage(e.Path)
	if err != nil {
		return err
	}

	// Set the entity's hash value using the loaded image.
	ah := hash.NewAverageHash()
	e.Hash = ah.GenerateHash(img)

	return s.repo.Create(e)
}

func (s *Service) List() ([]*entity.Image, error) {
	// Get all images.
	images, err := s.repo.List()
	if err != nil {
		return nil, err
	}

	if len(images) == 0 {
		return nil, entity.ErrNotFound
	}

	return images, nil
}

func (s *Service) GetDistances(path string) ([]*entity.Image, error) {
	// Load source image.
	img, err := hash.LoadAsImage(path)
	if err != nil {
		return nil, err
	}

	// Get the source image's hash.
	ah := hash.NewAverageHash()
	sourceImageHash := ah.GenerateHash(img)

	// Get all images.
	images, err := s.repo.List()
	if err != nil {
		return nil, err
	}
	if len(images) == 0 {
		return nil, entity.ErrNotFound
	}

	// Calculate distances for each image with respect to the source image.
	for _, img := range images {
		img.Distance = hash.CalculateDistance(sourceImageHash, img.Hash)
	}

	return images, nil
}
Results 
Search results, sorted by distance:
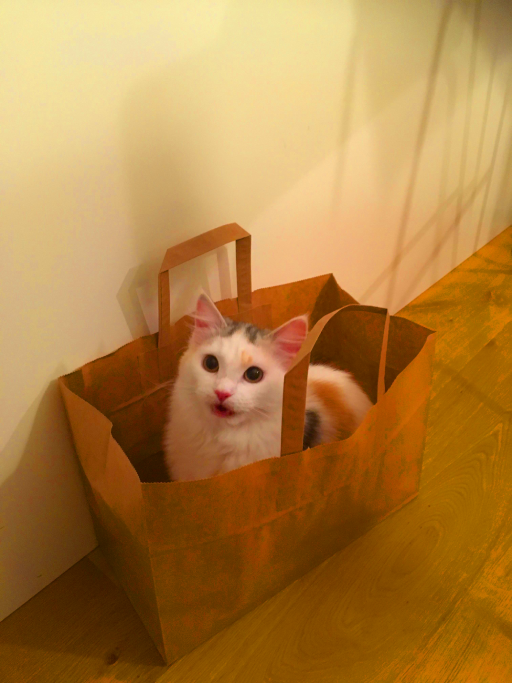
The query image is the distorted image (paper-bag-cat-distorted.png):

Here is the JSON returned from the hashsearch API:
❯ curl -s --location --request POST 'localhost:8081/v1/search' --form 'file=@"paper-bag-cat-distorted.png"' | jq
[
  {
    "path": "files/paper-bag-cat-distorted.png",
    "distance": 0,
    "hash": "0000111000011110001111100001111000000110000011100000111000111110"
  },
  {
    "path": "files/paper-bag-cat-saturated.png",
    "distance": 7,
    "hash": "0000111000001110000011100000111000101110000011100001111000111110"
  },
  {
    "path": "files/paper-bag-cat-text.png",
    "distance": 7,
    "hash": "0000111000001110000011100000111000101110000011100001111000111110"
  },
  {
    "path": "files/paper-bag-cat.png",
    "distance": 7,
    "hash": "0000111000001110000011100000111000101110000011100001111000111110"
  },
  {
    "path": "files/cat.png",
    "distance": 36,
    "hash": "0000000001111100111111001111100011111000111110000111110000000000"
  }
]
Here’s a better representation:
| Image | Distance | Hash |
|---|---|---|
| (input image (distorted + text)) |
0 | 0000111000011110001111100001111000000110000011100000111000111110 |
 (saturated image) (saturated image) |
7 | 0000111000001110000011100000111000101110000011100001111000111110 |
 (image with text) (image with text) |
7 | 0000111000001110000011100000111000101110000011100001111000111110 |
| (original image) |
7 | 0000111000001110000011100000111000101110000011100001111000111110 |
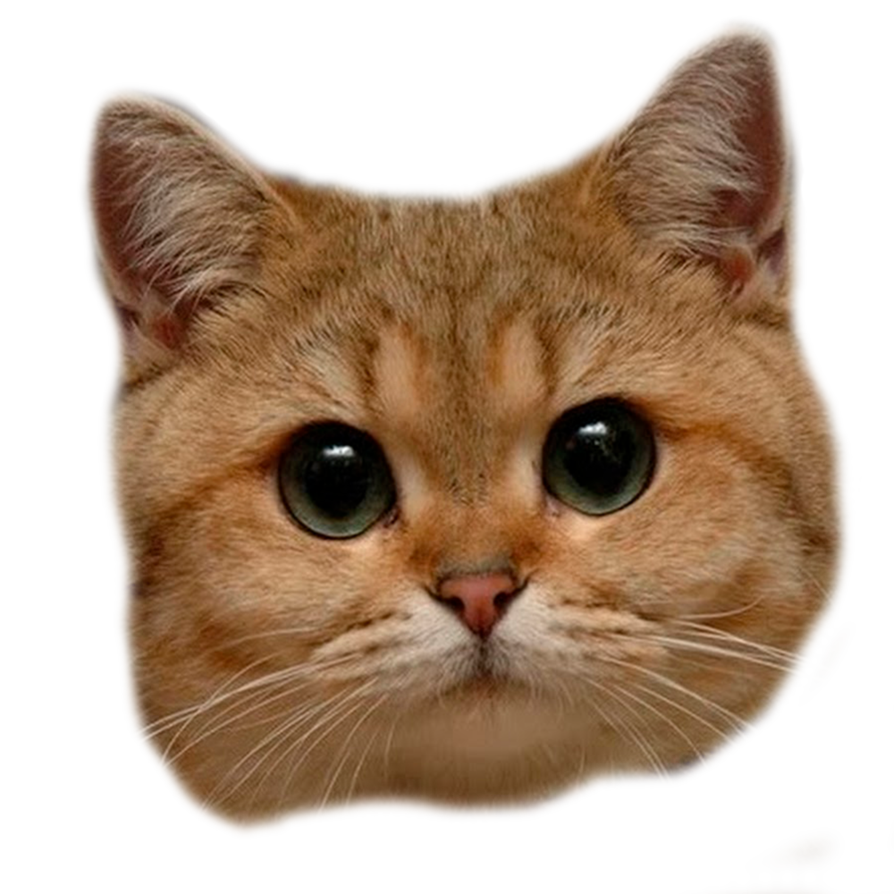 (a different cat image) (a different cat image) |
36 | 0000000001111100111111001111100011111000111110000111110000000000 |
Even with a distorted image, the engine picks up on similar images based on visual content.
It works well on slight image modifications like saturation, text content, etc. The distance is almost same for all the paper bag cat images, as the visual content in all those images are similar, and, ahash does a nice job by not drastically changing the hash content.
A different cat image, should have different visual content as compared to the input image, hence, a higher distance overall.
This implementation should be effective for small-scale usecases like blocking spam/restricted images based on a pre-built library of restricted/spam images, as it is resistant to smaller image modifications/augmentations like watermarks, text overlays, etc.
Optimizations 
This is a basic implementation using average hash as the core fingerprinting algorithm. While average hash (ahash) is a simple and efficient algorithm for generating perceptual hashes, there are some drawbacks:
- ahash isn’t resistant to image rotation, scaling, and translation.
- Since ahash is a simple algorithm, and is based on the average of the image pixels, it can be insensitive to local features, which impacts the accuracy of the search engine.
Other developments have been made in this space, and one such technique is difference hash (dHash), which computes the difference between adjacent pixels in an image. Other hashing algorithms include pHash, wavelet hash, etc. Using these techniques might improve the accuracy of the engine.
The current implementation works fine, scanning and comparing against each image is good enough for ~1k images. But it definitely won’t scale.
As the size of the database grows, the time it takes to compare the input image’s ahash to all the hashes in the database can become a bottleneck. BK trees could be a good fit in this space, as we’re dealing with distances.
A BK tree is a data structure that is used to store a set of items in a way that allows for efficient searching. For this project, a BK tree could be used to store the perceptual hashes of a set of images. The tree is constructed in such a way that images with similar perceptual hashes are stored close to each other in the tree.
To search for an image in the BK tree, we traverse the tree and compare the distance of the query image hash to the hashes in the nodes. This approach significantly reduces the number of hash comparisons that need to be performed, resulting in faster search times.
Conclusion 
This was a fun project overall; got to learn things like perceptual hashing and efficient searching techniques. The next step is to add multiple hashing algorithms like dHash, pHash and improve the search performance by using BK-trees.
You can check out the project at github.com/burntcarrot/hashsearch.